
Step 1
Log in to your Advertiser Dashboard. Go to Tools, and click on 'Create an Opt-in page'.
Step 2
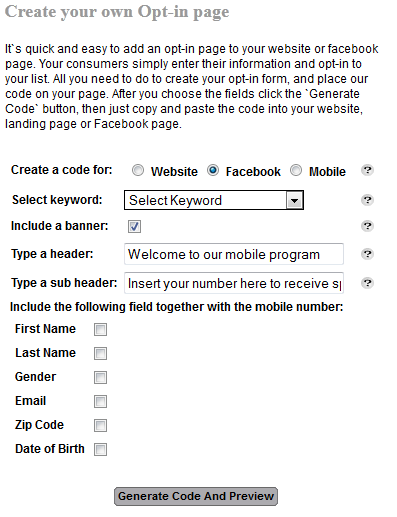
Step 3
When you are done customizing your page, click Generate Code and Preview. This will allow you to see your page and make any necessary adjustments. When you are finished with that, scroll down to your code. Be sure to copy the code so you can paste it into Facebook.
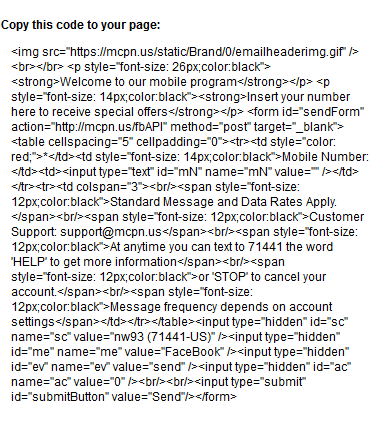
Your code will look like this
Step 4
Now Log onto the facebook account which administrates the page where you want to embed your opt-in page. Go to the search bar at the top and search My Tab. Click the first result. This will take you to the application's welcome page. (It will ask you to allow the app on your page. Click allow. Once you do, "My Tabs" will appears on the left hand side under "Apps". You can also access "My Tabs" by typing it in the search tool above.
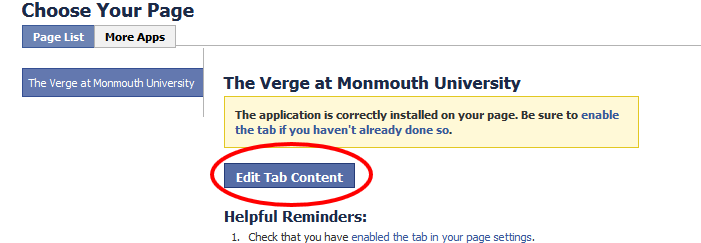
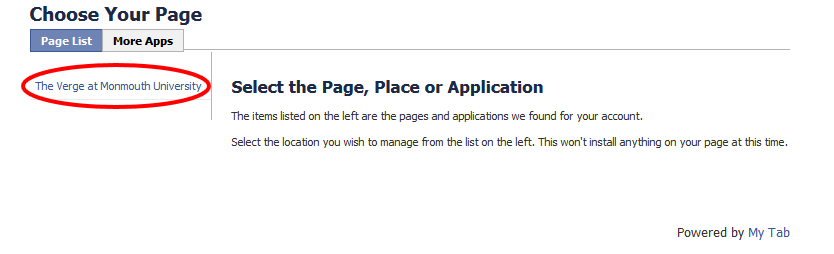
Click on your page name under where it says "Page List"

Once you click on your page, you will see this page. Click on "Edit Tab Content"
Once in there, paste the opt in code you created into the text box. Then click save once you are done.

Once you save, click on "Page List" on the top left to go back to the screen that shows your page name
Step 5
You will be brought back to this screen. Click on your page.
 .
.
This is the next screen you will see. Click on "enabled the tab in your page settings" under Helpful Reminders

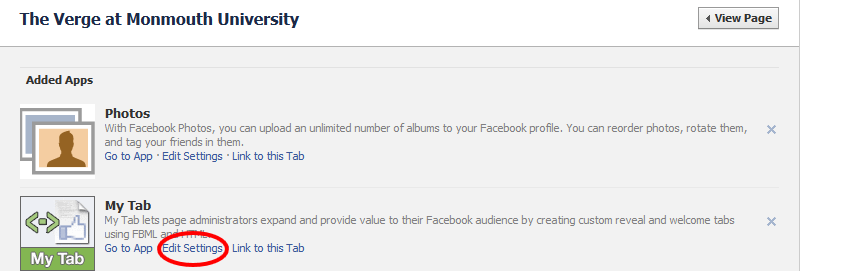
Next you will see this table below. Click "Edit Settings under the "My Tab" section
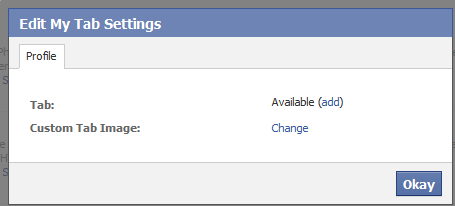
Once you click edit settings you will see this screen
Click "Add" next to where it says Available
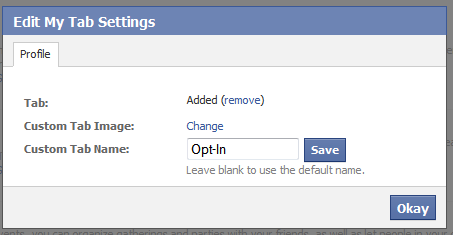
Here you can change you custom tab name (where users will opt-in), as well as the image of your tab page. Click save first after you change your tab name before changing your image!!!!! After you save your opt in name title, click "Change" where it says "Custom Tab Images" to change your picture.
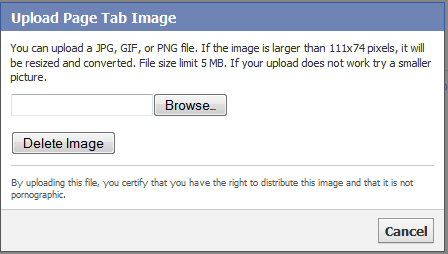
Once you go to change your image, this will be the upload screen. Choose your picture by clicking "Browse"
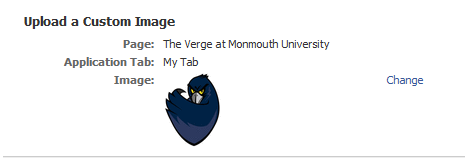
After you choose your pic (the hawk as the example below)...your image will successfully be changed and saved. There is no other option to do now but hit "Home" on the top left corner and go back to your page.
Your opt-in page will appear under the "Like" button of your page.

0 Comments